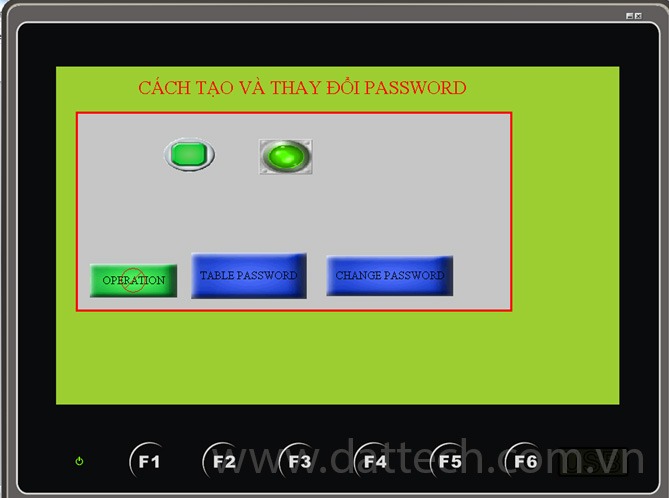
Guide on Creating and Modifying Passwords on the HMI Interface
In a factory system, some systems require settings within a single interface page, while others may need multiple interface pages. The more complex the system, the greater the number of interfaces, and especially within those interfaces, there may be a lot of data to display and configure. Additionally, not all parameters can always be made public; some parameters need protection, and only certain authorized individuals such as designers, managers, or engineers should be allowed to modify them to ensure the system’s stability according to the configured parameters. INVT’s VT designer software offers the “Button function” tool to simplify and enhance system management and protection.
Steps for Creating a Password for the Interface
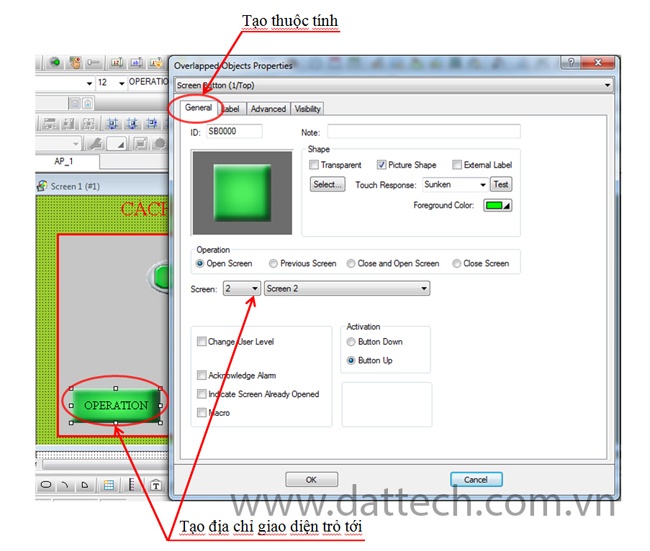
Step 1: Navigate to the object toolbar, select “Button Screen,” and a “Button Screen” window will be created. Click on the object, then the “General” tab to initialize attributes:
+ Border color: Define the border color.
+ Foregound color .
+ pattem:
+ Foregound color: Choose the color of the block.
+ Screen: Initialize the target interface page.
Step 2: Click on the “Label” tab to set the label for clarification
+ Enter text to change the label
+ Click on the picture to choose the image to display
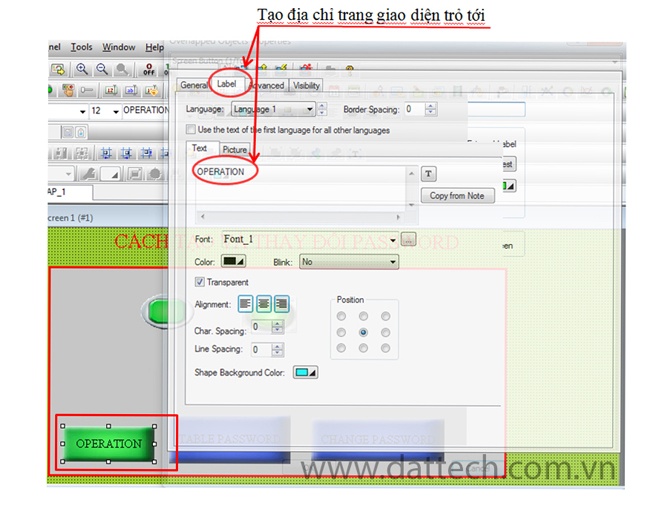
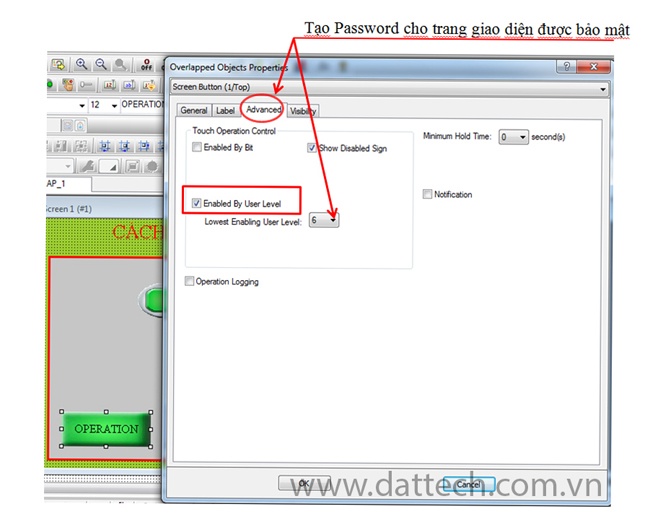
+ Check Enabled by user level to set a password for the object
Users can choose the level of protection, from level 1 to level 9. Click “OK” to save these attributes.
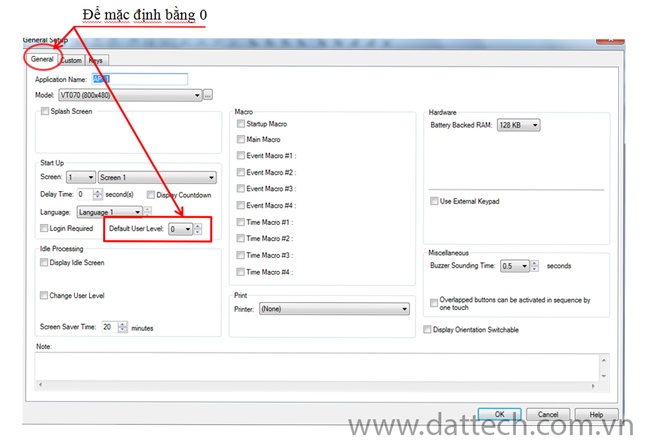
Note: Passwords only take effect when you specify the “Default user level” in the “General setup” page as 0.
Changing the Password for the Interface:
When users want to proactively manage the password for their program, we will create an additional “button function.” The purpose of creating this button is to allow users to directly change the password on the HMI interface without having to enter the program on the computer screen to change the password. This makes it more convenient and efficient for users to manage and utilize their interface.
Steps for Changing the Password for the Interface:
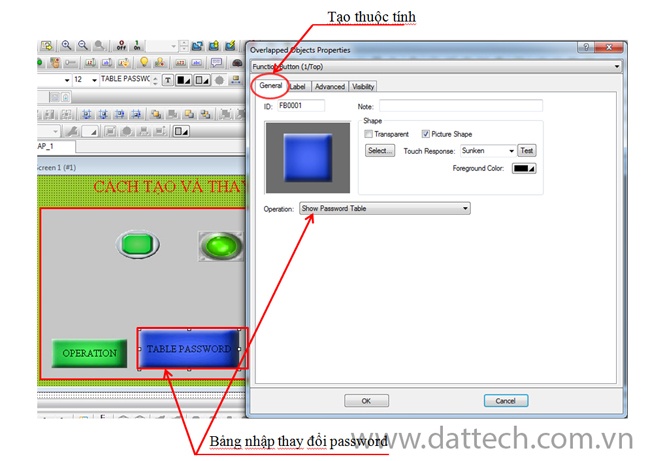
Step 1: Navigate to the object toolbar, select “Function Button,” and a “Function Button” window will be created. Click on the object, then the “General” tab to initialize attributes:
+ Select: Create a shape and color for the object.
+ Picture shape: Choose a shape for the object from the library.
+ Operation: Choose the type of operation for the object.
To change the password, select the operation type “Show password table.” With this option, users can change the password. Note that users can only change the password to an equal or lower level than their current password level.
Step 2: Navigate to the object toolbar, select “Function Button,” and a “Function Button” window will be created. Click on the object, then the “General” tab to initialize attributes:
+ Select: Create a shape and color for the object.
+ Picture shape: Choose a shape for the object from the library.
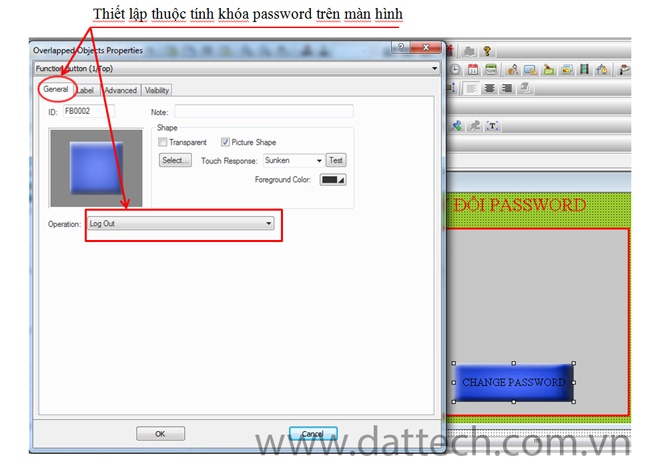
+ Operation: Choose the type of operation for the object.
To lock the password again, select the operation type “Log out.” This will instantly relock the password on the opened password-protected interface page.
This step is optional and depends on the user’s purpose.
Step 4: Create a new screen.
You can refer to the guide on creating multiple interface pages to learn how to create multiple interface pages.
Step 5: Run the simulation.
– Choose “Compile” -> “Run Offline Simulation.”
Run in real-time.
– Choose complie-> -> Download -> tick “USB” -> perform actions on the HMI screen
For further support and consultation on creating and modifying passwords on the HMI screen, please contact our hotline at 1800 6567.


